

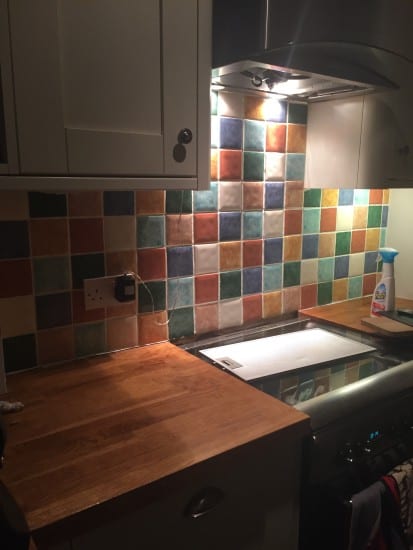
We’ve been in our rented house for 18 months now. When we first moved in the kitchen was painted orange to co-ordinate with the tiles (see below) So I instantly painted the kitchen an off white colour as this was the only neutral shade that would work with the tiles and the cupboards. However, I knew the kitchen would look much better with different tiles. Replacing them was going to be too costly so I asked the landlords if they would mind if I painted them and they gave me the thumbs up!

I was actually quite nervous about doing this to be honest so I did lots of research and I’m pleased to tell you that I absolutely love the transformation. So here’s what I did.
The first step is to deep clean the ceramic tiles and grout. For this any good detergent or sugar soap will work, I used Flash spray with bleach (love that stuff) which instantly dissolves any grease. I then gave them a good rinse with hot water and waited for them to dry thoroughly.
I masked up around the edges to stop paint going onto the walls and worktop.
Now for the serious stuff! There are many different tile paints around but the colours are limited so I decided to use a primer which then means you can use any brand of paint over the top.
The primer that I used is called Zinsser Bulls eye 1.2.3 (see below)I got it from our local paint store, Williamsons but you can also get it in most of the large DIY chains. I have used it so many times and it’s brilliant. It adheres to all surfaces, both exterior and interior and you don’t even need to sand the surface before (yippee, far too much like hard work!) I used two coats of this and it dries really quickly.
 |
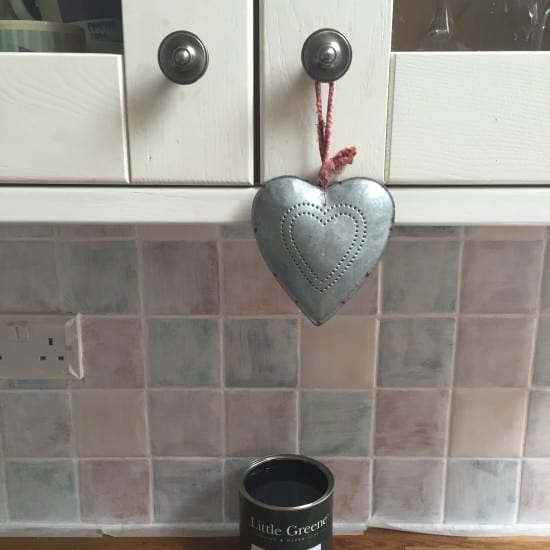 |
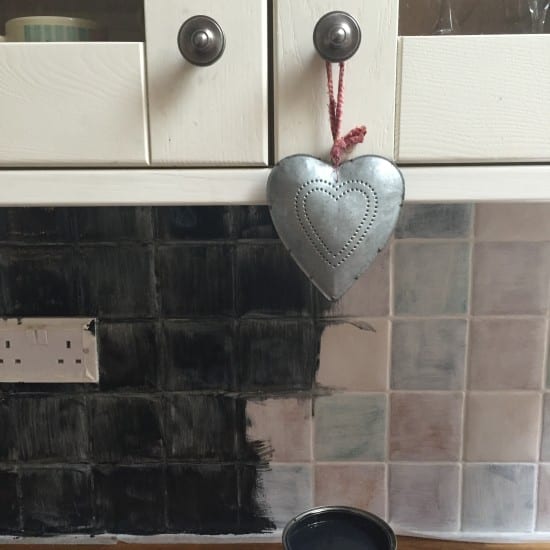
So for the actual paint, I was worried about going for a matt finish as I love cooking so I’m constantly scrubbing the kitchen and worried the paint wouldn’t clean well or would eventually rub off. Oil based paints are much tougher so I chose a Little Greene company Oil based gloss in a delicious off black hue. By this point I couldn’t wait to start slapping the gorgeous, dark, silky paint on. You can see the 1st and 2nd coats below .
 |
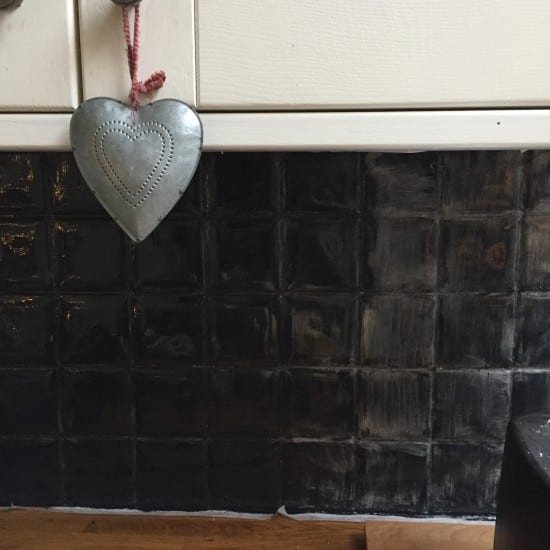 |
So it took 3 coats of gloss to get a full coverage. Here’s how it looks…..
 |
 |
 |
 |
I am delighted with it and so glad I took the plunge. I wasn’t sure how the grout would look painted but I love the overall finish and the contrast against the cream units. A few months down the line and they still look exactly the same as when I first painted them, the gloss finish is easy to wipe down, any splashes just sit on the surface and wipe off.
The kitchen is the heart of our house, we spend so much time together as a family in there so it was important to me that the most used room in the house is a space that I want to spend the most time in and that it feels welcoming and relaxing. Even a G&T now tastes better in there!
 |
 |
So what do you think? Have you ever been tempted to paint your tiles but worried about how it would turn out? Has this post inspired you to take the plunge? Would love to hear your thoughts.
I’ve also worked out how to add on the subscription box, which you’ll find to the right on a pc or below on a mobile device. So please pop your email address in then you’ll get my posts dropping into your inbox each time I blog!
K x


Fab tile makeover! Can I ask did you use a brush or a foam roller? Thanks
Hi Charlotte,
I used a brush, I find rollers very messy!
Good luck, Kerry x
I love the tiles post! Just read it and encouraged me to take be plunge tomorrow!! Fingers crossed it looks as good as yours!!
How did it go?
I’ve just come across your blog after seeing you featured on the Made Unboxed facebook page.
I live in Northumberland too and we are busy renovating a house we moved into in April last year. The previous owner was an elderly man and the house was / is very dated. Think late 80’s early 90’s floral swags & tails curtains, austrian blinds and mushroom coloured shell bathroom suite!
We were just discussing at the weekend possibly painting over the flower design tiles in the kitchen so that it up dates the look a bit until we can afford to renovate the whole kitchen in a year or two. I’ll definitely look into doing this now as its exactly what we wanted and the effect looks great.
You’ve found a new reader of your blog 🙂
Hi Emma,
Thank you so much for your lovely message. It’s always great to get feedback, especially as lovely as this! Hope I continue to inspire you and good luck with your kitchen tiles. Mine are still looking fab after a year of being painted! Kerry x
Hi, just reading about your tile transformation, it looks fab. So by using the 123 primer can you then use any paint or does it have to be tile paint? X
Hi, It can be any paint. Although I would reccommend gloss for a wipeable finish. Kerry x
What color is your kitchen tile backsplash? Thank you!!
Hi, sounds great may try this myself. What gloss did you use?
Hi, I used a Little Greene company gloss x
Hi Kerry,
Love this tile re-fresh. We have the same kitchen in our new flat and I am definitely going to give the tiles a paint now!
What off white colour did you use for the walls? It looks great with the cream cabinets. X
Hi, Thank you. It is called Cool Harbour by Little Greene paint company x
Hi it looks fab, and has definitely inspired me to revamp mine now!!!! I’ve even added this to my home page for ease of getting the right primer x